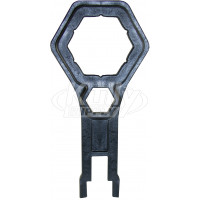
Items Included
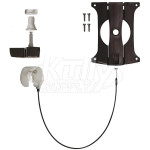
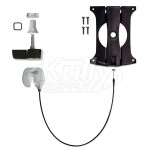
Cartridge Actuator Mechanism Plate (black plastic)
Plate Attachment Screws (Qty. 4)
Crank Housing with Universal 16.5” Cable
Chrome Plated Handle Assembly
Handle Bushing (white plastic- fits into square handle opening in toilet tank)
Handle Nut (white plastic)
Description
Tools Required: Philips Screwdriver
Operation and Maintenance
Installing the 504 Handle Replacement Kit
Prior to Installation: Remove the existing handle and note its orientation. The new handle should be installed facing the same direction. If you have a flush rod, clips, and screws, remove them before you start.
- Remove the Handle Nut using a pliers. The nut has a left-hand thread (clockwise to loosen and counter-clockwise to tighten).
- Remove the handle by guiding it through the opening of the toilet tank.
- Place the black spacer and bushing into the hole of the toilet tank. If the black spacer is too big for the hole, remove and re-insert the bushing without the spacer.
- On the inside of the toilet tank, hand-tighten the handle nut snug around the bushing by turning counter-clockwise.
- Orient new handle in the same direction as the original handle. Insert into place until the stem of the handle extends past the bushing or until you hear/feel it click into place.
- Gently remove the disposable cap from the barrel end of the cable. Discard the cap.
- Lift the lever and push the barrel end of the cable up through hole on underside of the black plastic frame until it clicks into place.
- Guide the cable end into the lever slot.
- Raise the lever to seat the white barrel into catch until it clicks.
- Position the frame and lever with the cable facing the front of the toilet tank and secure with the 4 screws (rest the white cassette on the side of the tank). The toilet may begin to flush and run while you tighten screws and secure frame.
- To begin the flush-lever alignment, hold the actuator in place and loosen the set screw
- Adjust the black actuator height to align the lever and frame. (Turn counter-clockwise to position the actuator higher or clockwise to position lower)
- Properly align the top edge of the lever with the top edge of the frame.
- Match the handle icon on the white cassette to the direction of the toilet handle and lift handle to horizontal position.
- Maintain alignment of the cassette, and guide it down over the protruding handle stem until it clicks into place.
- Gently push the handle to test movement. If the handle doesn’t move properly, revisit the part orientation.
- Once properly aligned, hold the actuator in place and tighten set screw to secure.
- Place toilet lid back onto the toilet tank.
Manufacturer Info
Sloan FLUSHMATE® is a division of Sloan Valve Company. FLUSHMATE manufacturers high-performance, water saving pressure-assisted toilet flush systems. Those systems are then installed in toilets manufactured by OEM brands such as Gerber, Mansfield, American-Standard, and Crane.
To contact Flushmate directly please call 1-800-533-3460
You can also visit Flushmate’s website directly for Product Registration, to view Warranty Info, to view Recall Info, or Contact Flushmate.


